Access to a client's profile on the Family Portal can be granted to clients or client contacts. To add a new portal user, you must first add them as a contact for the client whose portal profile you wish to grant access to. Note that a single client or contact can be granted access to multiple client profiles on the Family Portal.
![]() Important note: all Family Portal user accounts for your organization must have a unique email address as a username. You cannot use the same email address for multiple accounts (for example, a client and a contact cannot use the same email address for accessing the Family Portal).
Important note: all Family Portal user accounts for your organization must have a unique email address as a username. You cannot use the same email address for multiple accounts (for example, a client and a contact cannot use the same email address for accessing the Family Portal).
Roles and permissions
![]() The following ACL is required to allow employees to manage access to the Family Portal for clients and client contacts:
The following ACL is required to allow employees to manage access to the Family Portal for clients and client contacts:
- Workflow> Manage family portal access: employees in a role configured with this ACL will be able to see the options to add family portal access and manage family portal access for clients and client contacts.
Managing access for clients
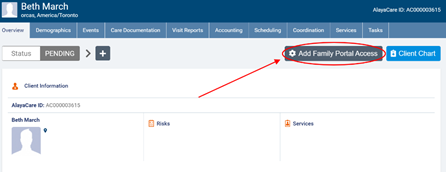
To grant a client access to the Family Portal, select the Add Family Portal Access button from the Overview tab on the client profile. This button will only be displayed to clients who do not yet have access to their Family Portal profile.
In the dialogue, enter the login email address to which you wish to send the email invite. If the client has an email address, the field will be pre-populated with that address. You can edit the field to use a different email if you wish. Note that you cannot use the same email address to give a client contact access to the portal.
If the client has an email address and already has access to a Family Portal profile, the field will be pre-populated with the login address used as the client’s Family Portal username. In this situation, you will not be able to use a different address.
Next, select a role (for example, patient). The roles available to select will depend on the client portal roles configured for your organization in Settings>Roles and permissions. The permissions assigned to the role you select for the contact will determine what types of information they are able to view in the portal.
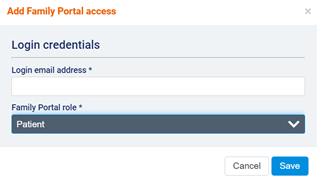
When you are ready, click Save. An invitation to access the Family Portal along with a temporary password will be sent to the contact’s email address using the appropriate email template configured by your organization.
If you need to resend the email to the client, select Resend invite. Note that this button will only be displayed for clients who have not yet logged on to the Family Portal.
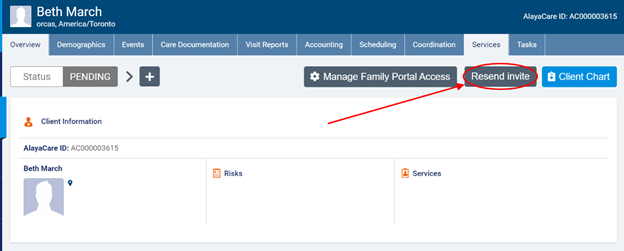
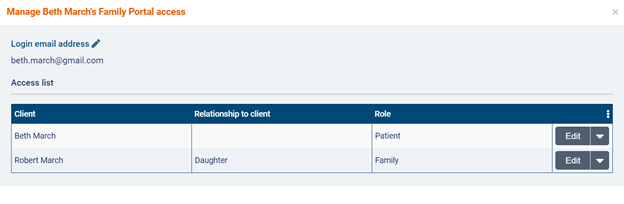
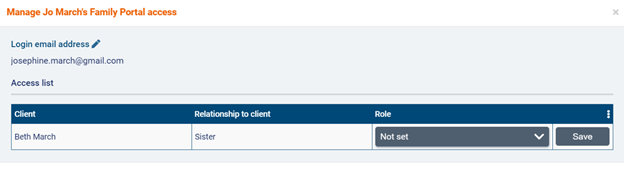
If you need to make changes to the client’s login email for the family portal or change their role, select Manage Family Portal Access.
To edit the client’s login email, click the pencil icon. Clicking this icon will take you to the Demographics tab of the client’s profile where you can edit their email address.
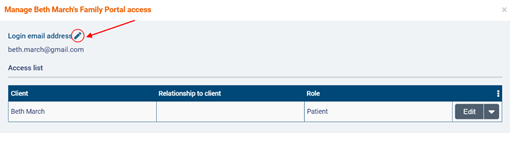
If the client has access to other Family Portal profiles, these profiles will also be listed.
To edit the client’s role for one of the profiles, select the Edit button.
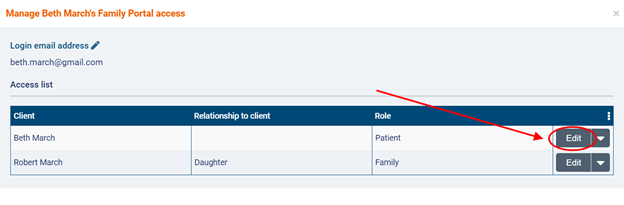
Select the new role you wish to set for the client and then select Save.

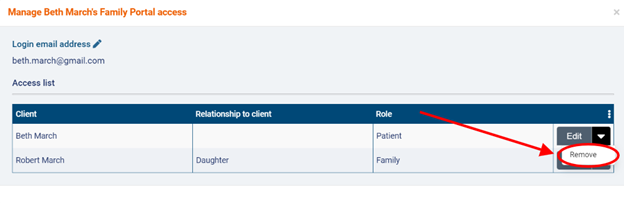
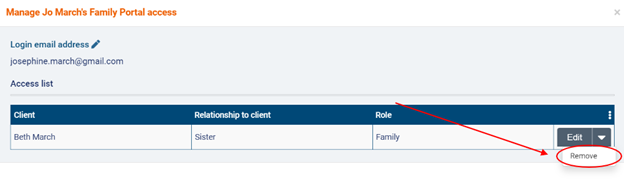
To remove a client’s access to a Family Portal profile, click the downward arrow next to Edit and select Remove.
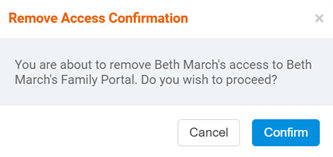
Click confirm to proceed.
Managing access for client contacts
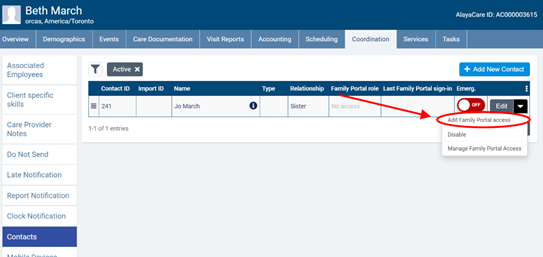
You can manage access to the Family Portal for any client contact listed on a client’s profile under Coordination>Contacts. To grant a client contact access to the Family Portal, select the downward arrow next to edit and select Add Family Portal access. This option will only be available to select for contacts that do not have access to the Family Portal yet.
In the dialogue, enter the email address to which you wish to send the invitation to access the Family Portal. This address will be the email the contact will use to log in to the portal. If the contact has an email address, the field will be pre-populated with that address. Note that if the client also has access to the Family Portal, you cannot use the client's email address as the contact's login email address.
You can edit the field to use a different email if you wish. If the contact has an email address and already has access to a Family Portal profile, the field will be pre-populated with the login email used as the contact’s Family Portal username. In this situation, you will not be able to use a different email.

Next, select the role you wish to assign the contact (for example, family, physician, etc.). The roles available to select will depend on the client portal roles configured for your organization in Settings>Roles and permissions. The permissions of the role you select for the contact will determine what kinds of client information they are able to view in the portal. When you have finished, click Save.
An invitation to access the Family Portal along with a temporary password will be sent to the contact’s email address using the appropriate email template configured by your organization.
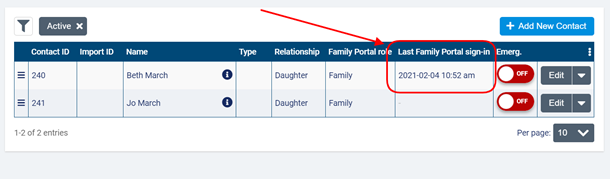
Once Family Portal access has been added for a client, you will be able to see their Family Portal role in the client’s list of contacts. Once they log in to the portal, you will also be able to see the date and time they last logged in to the portal from the Last Family Portal sign-in column in the client’s contact list.
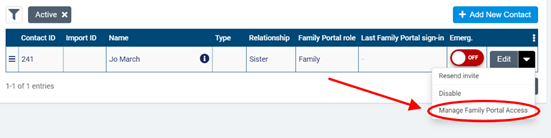
If you need to resend the invite email to the contact, select Resend invite. This option will only be available to select for contacts who not yet logged on to the Family Portal.

If you need to revoke a contact’s access to the Family Portal or change their role or login email, select Manage Family Portal access.
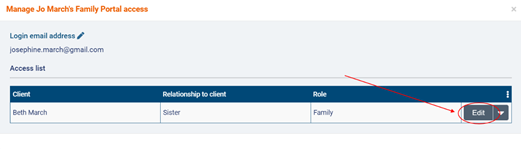
To edit the contact’s role, select the Edit button.
Select the new role you wish to set for the client and then select Save.
To remove a client’s access to the Family Portal, click the downward arrow next to Edit and select Remove.
Click Confirm to continue.
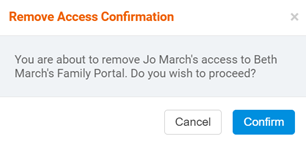
Note that disabling a client contact will also revoke the client’s access to the Family Portal. You will receive the above confirmation dialogue to confirm that you wish to remove the contact’s portal access.
If a client contact has been granted access to other Family Portal profiles, the other clients for which they have access will also be listed in the manage access screen.
Comments
0 comments
Article is closed for comments.